MENU
MENUKitset Outdoor Tables
Our outdoor table kitsets can be built by just about anyone using the minimal of tools, and their robust construction will give years of reliable service.
The slatted top means it will not be susceptible to cupping - the small gaps between slats will enable water to drain immediately.
The table frame can also be used to support a natural edge slab as the table top. The strong sub-frame will give the necessary strength to keep a single-piece slab reasonably flat and minimise warping.
| Length | Width | Price (inc. GST) | |
| 6 seater | 1290mm | 930mm | $600 |
| 8 seater | 1890mm | 930mm | $735 |
| 10 seater | 2490mm | 930mm | $900 |
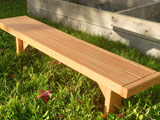 Our Kitset Bench Seats are designed and sized to match perfectly with these tables!
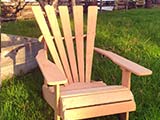
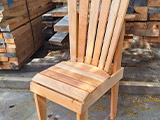 Our Macrocarpa Upright Chairs are perfect as end seats
The timber is dry, clear and dressed macrocarpa, and is supplied slightly over length for final trimming by the builder during the construction process.
All fastening hardware (screws, bolts, washers) is included in the kitset. Outdoor furniture oil is an optional extra.
You will need a drill and a 150mm long 6mm drill bit, construction adhesive, circular saw, and ideally a drop saw.
Below is the cut list giving all the provided pieces for construction:
Select table size:
| Quantity | Dimensions (mm) | Length (mm) | |
| Slats | 6 | 140x45 | 1200 |
| Cross Members | 2 | 90x45 | 840 |
| Legs | 2 | 290x45 | 610 |
| Leg Bases | 2 | 65x45 | 930 |
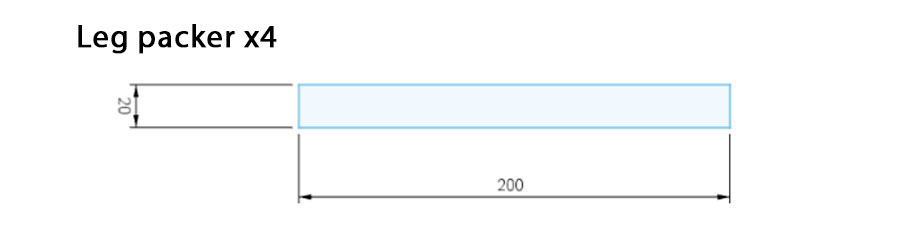
| Packers | 4 | 40x20 | 200 |
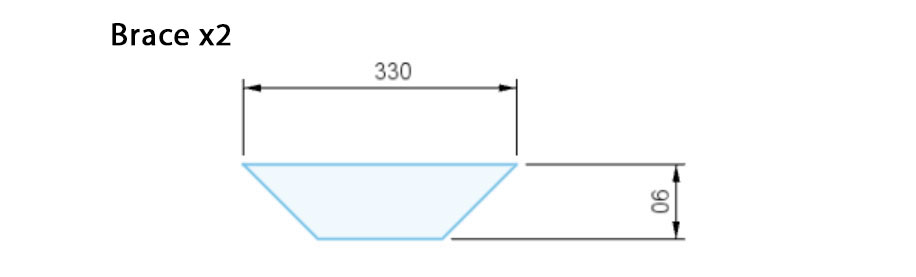
| Braces | 2 | 90x45 | 330 |
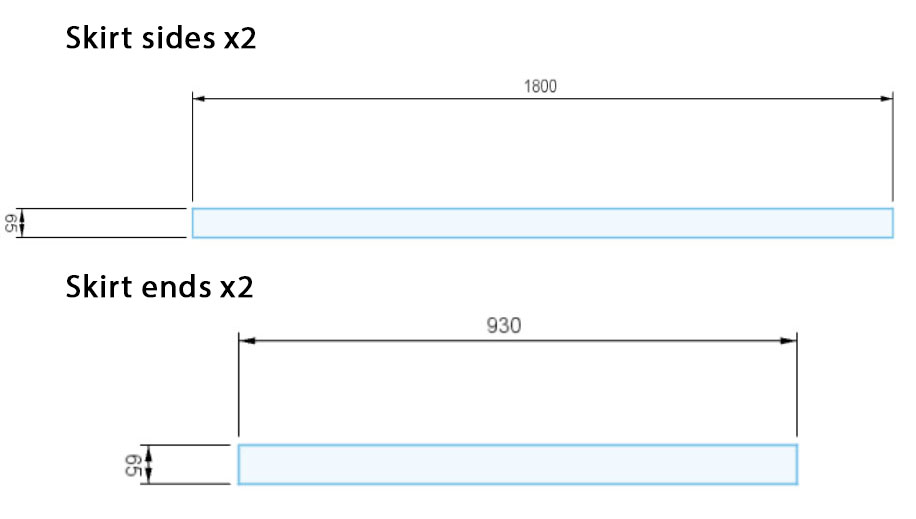
| Skirts (side) | 2 | 65x45 | 1200 |
| Skirts (end) | 2 | 65x45 | 930 |
| Quantity | |
| M10x150 galvanised coach screws and washers | 6 |
| M10x100 galvanised coach bolts and washers | 6 |
| 75x14g galvanised bugle screws | 4 |
| 125x14g galvanised bugle screws | 24 |
| 100x14g galvanised bugle screws | 40 |
| Hex driver bit | 1 |
Watch our YouTube video showing the construction process:
Instructions
1) The first thing we need to do is take the sharp edges off the timber. Sharp edges can be a source of splinters in the long term. This can done simply using coarse sand paper, or an electric planer held at 45 degrees, or a router with a pencil rounding bit.
2) First we will start with the table top slats:
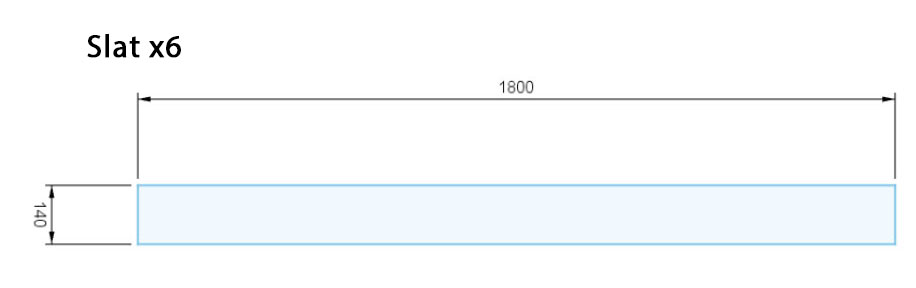
The slats will be six long pieces of dressed 150x50, which when machined actually measure 140x45. This will ultimately give a table width of 930mm which is quite adequate for an outdoor table. Lay them out on the ground - with the side you want visible face-down - and arrange the boards so any gaps caused by slight curves are minimised. Make sure you keep them in this order for the entire process.
Draw two line marks across all of the slats. The distance between these lines is determined by the size of your table:
- 6 seater: 1200mm apart
- 8 seater: 1800mm apart
- 10 seater: 2400mm apart
3) Now we are ready to cut the two cross members.
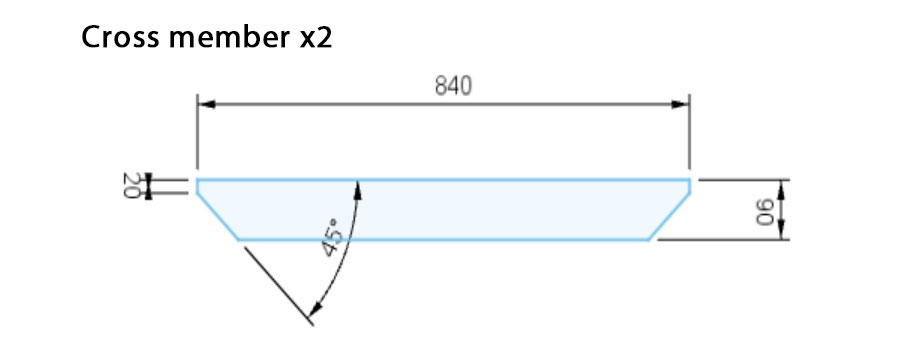
The two cross members are 90x45 and they will be cut to 840mm long and have 45 degree cuts as shown. These are positioned 280mm in from the two cut lines you made in step 2.
- The 10-seater 2400mm long table has a third cross member in the center for stability. Position this 1200mm in from an end cut line.
4) Next we construct the legs.
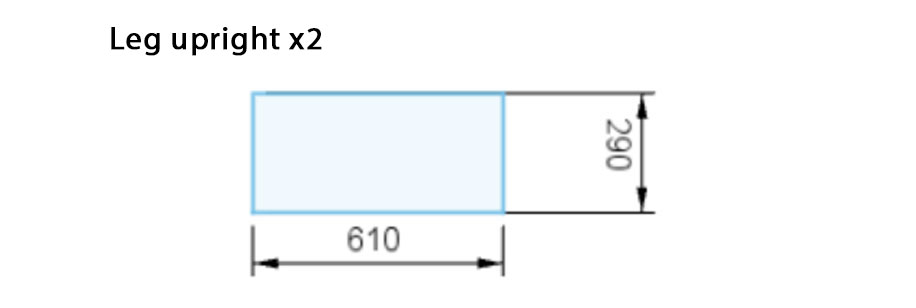
The uprights are two pieces of 290x45 cut to 610mm long. This will mean the table height will be the standard 740mm from the floor to the top surface.
The leg bases are 65x45 and they will be cut to 930mm long and have a tapered cut as shown.

On the underside of these we drill three 20mm deep/32mm diameter countersink holes – one in the centre and the other two 110mm either side. We then drill a 12mm hole right through each of these. Using M10x150 galvanised coach screws, screw and glue the leg bases to the uprights. To avoid splitting, drill a 6mm pilot hole into the end grain of the upright.
5) On the underside of the leg bases screw and glue the four packers. These raise the table leg base off the ground to create ventilation, and prevent rocking that may occur with the large surface area of the leg base on its own.
6) Now fix the leg assembly to the table top's cross members from step 3 using three M10x100 coachbolts for each leg. Attach these to the side of the cross member facing the center of the table.
If you are assembling the 10-seater table, attach them to the two outer cross members.
To add extra stability add two short 90x45 diagonal braces to the inner side of each leg using 100mm long 14 gauge batten screws. Drill a 6mm pilot hole right through the first piece.
7) Now stand the table up and screw the 1200/1800/2400mm long 65x45 skirts to the edge of the slats from step 2 using 100mm long 14 gauge screws spaced about 450mm apart. Ensuring the skirts cover the space between the two marks you made earlier.
8) Cut the table top to length with a circular saw guided by a straight edge, along the two markings you made in step 2. You may find it helpful to extend those markings around to the top face of the table before cutting.
9) The final step is to cut and screw on the 65x45 end skirts.
This will give the table a heavier look and will protect the end grain of the slats from cracking. Use 100mm long 14 gauge batten screws, first drilling a 6mm pilot hole right through the first piece.
Sealing the table: To finish your table, seal the timber with Osmo decking oil to protect it from the elements.
View our Kitset Outdoor Bench Seats, designed and sized to match perfectly with these tables!
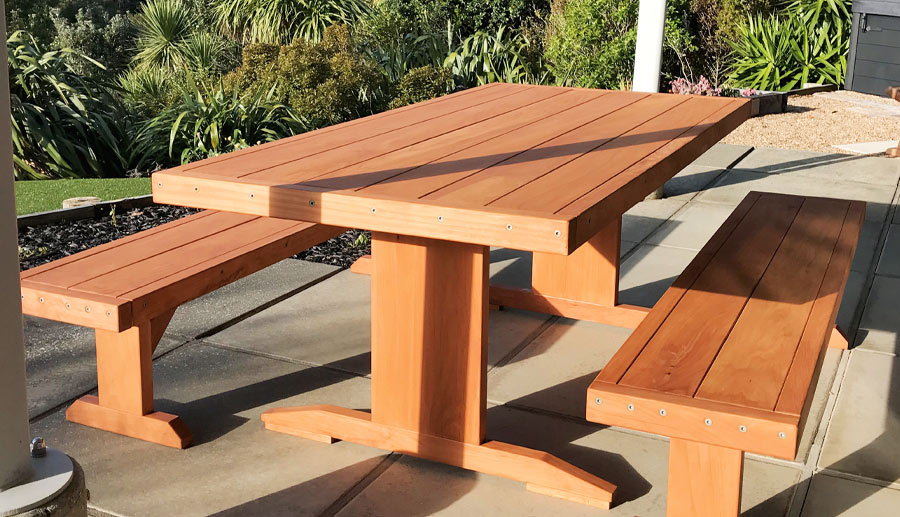
Photos of the constructed table
-
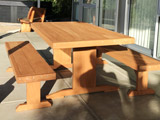
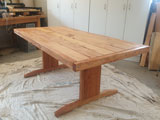
Constructed table
-
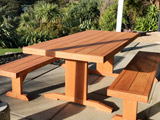
Constructed table
-
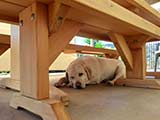
Our tables also provide shade!
-

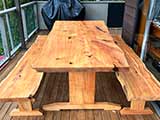
10-person setup with benches and end seats
-
10-person setup with benches and end seats
-
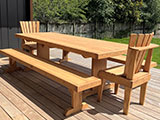
Constructed table & bench seats
-
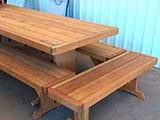
Constructed table & bench seats
-
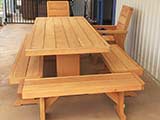
Constructed table
-
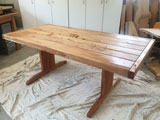
Constructed table
-
Natural edge slab top kitset table
-

Natural edge slab top kitset table
-

Constructed outdoor tables